
 |
Brochure |
Step 1
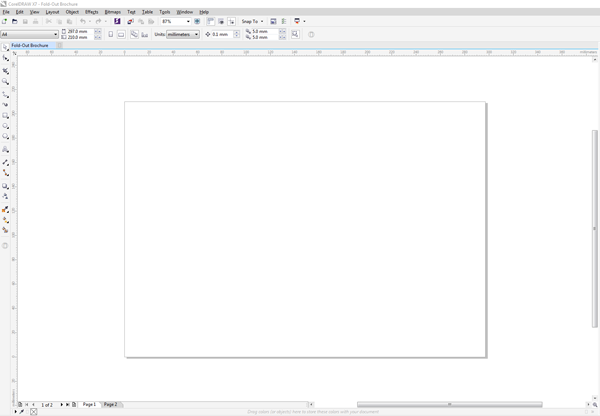
Open up CorelDRAW, and select File > New.
Give the document a name, e.g. ‘Fold-Out Brochure’, and set the Size to A4. To the right of the Height text box, select the Landscape orientation icon.
Under Number of Pages, up the value to 2, and ensure the Primary Color Mode is set to CMYK and Rendering Resolution is set to 300 dpi, so the document is optimized for print.

Step 2
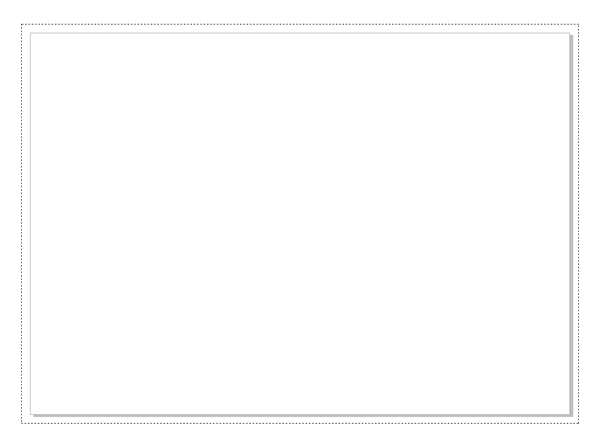
If you’re planning to send your brochure for professional printing, you will need to allow for a bleed on your layout. This extends past the edge of the page, minimizing the visibility of any slight trimming errors post-printing.
To add a bleed to your CorelDRAW layout, go to Layout > Page Setup. At the bottom of the window, you can see options for Bleed. Set the Bleed to a generous 5.0, check the box next to Show bleed area, and click OK.

Step 3
Let’s rename the pages of the brochure so we know which side we’re working on at any time.
At the bottom left of the work space, you can see the two tabs which show Page 1 and Page 2 of the document. Right-click > Rename Page for each, renaming Page 1 as Front and Page 2 as Reverse.


Remaining on the Front page of our brochure, let’s set up a series of guides which will help us see where the final brochure will be folded.
You can drag guides out onto the page by clicking on the ruler running along the left-hand side of the work space, next to the Toolbox, and dragging to the right onto the page.

Drag a guide out from the left-hand ruler to 99 mm. You can manually type in the X position of the guide from the Property Bar (Control-Enter, if not shown by default) running along the top left of the work space, to make it precise.


Drag a second guide to 198 mm. This has marked out the central section of the brochure.
Drag a third guide out to 49.5 mm and a fourth to 247.5 mm. These mark out the folds of the outside flaps.

If you briefly switch over to the Reverse page of the brochure, you’ll notice that CorelDRAW has automatically applied these guides to the Reverse page as well. Return to the Front page before you begin working again.
Create a Sequence of Layers
Step 1
Creating a series of layers in your document will keep your work easily editable and organized.
You can find information about Layers in the Object Manager panel, which is docked at the far right side of the work space.

Click the Object Manager tab to expand it.

You’ll notice that a layer called Guides has already been created in the Object Manager panel. Create a second new layer (by selecting New Layer from the drop-down menu in the top-right corner) called Images, which will sit below Guides.
Create a second new layer, and name it Colour. Create a third, called Coloured Shapes. Finally create a layer called Typography, which sits at the top of the stack of layers, sitting just below Guides.

Step 2
Click on the pencil icon to the left of each layer’s name in the Object Manager panel to Lock each layer, except Images. Click on Images to activate it.

Build Up Images on Your Brochure
Step 1
With the Images layer active, go to File > Import (or hit Control-I on the keyboard). Select the beach image and click Import.
Position the image so that it roughly crosses the right flap and central section of the brochure, with the top of the image crossing the top edge of the page, as shown.

Drag the image in on itself, by grabbing one of the square markers on the right or left side of the image to flip it horizontally, so that the image of the beach town is now up in the top left corner.

You'll notice that the image is quite tall, and we don't really need to have the top third of the photo, as this will not be included on the page.
It's really simple to edit the proportions of the photo, as well as other features like color, by opening up Corel PHOTO-PAINT from within the CorelDRAW application. Let's do that now.
Select the image of the beach with your cursor, then navigate to Bitmap on the menu bar. Select Edit Bitmap... from the drop-down menu.

The image opens up in a new Corel PHOTO-PAINT window.

Select the Crop Tool (D) from the left-hand Toolbox.

Drag your mouse across the bottom two-thirds of the image, cutting out the area of blue sky above the dense stretch of clouds sitting just above the beach-side town.

Hit Enter to crop the image.

You can also optionally play around with the color of the image using the effects available in Corel PHOTO-PAINT.
Go to Adjust > Vibrance from the menu bar at the top of the workspace.

Increase the Vibrance level to 33% and up Saturation to 13% to give the color of the photo an extra 'sunny' boost!

When you're happy with your image edits click the Finish Editing button, to the far-right of the Property Bar.

When prompted with a Save Changes message click Yes.

You're returned to the CorelDRAW brochure document and your image is now more cropped and neatly fitted to the page. No matter if some of the image still extends beyond the bleed line—this won't affect your final printed result.
Step 2
Select the image and Edit > Copy, Edit > Paste. Position over to the right side of the page, and select the Crop Tool from the Toolbox at the left of the workspace.

Crop the image so that just a section of the photo is visible, nestled between the 198 mm and 247.5 mm guides (the second section of the brochure, from the right).

5. Create an Eye-Catching Color Palette
Our brochure is going to be super colorful, with a range of shades, from hot (orange, red, pink) to cold (lime green, purple, turquoise, blue). Let’s prepare a color palette in CorelDRAW, ready for us to use on the layout.
Step 1
Return to the Object Manager and Lock the Images layer. Unlock the next layer up, Color.

Go to Window from the menu bar, and select Dockers > Color Palette Manager. You can also access all the Dockers by clicking the '+' icon which you find between the color palettes and listed dockers on the far right of the workspace.

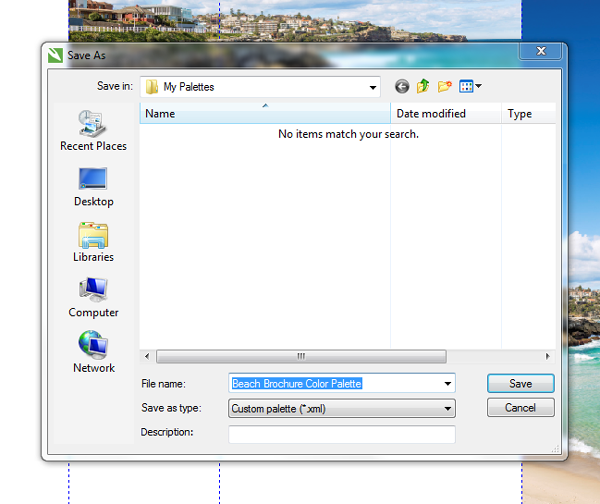
In the Palette Manager, click on the Create a New Empty Color Palette icon. In the Save As window that opens, give the Palette a recognisable name, like‘Beach Brochure Color Palette’ and click Save.
In the Color Palette Manager, choose the custom palette you’ve created,‘Beach Brochure Color Palette’. Click the Open the Palette Editor icon to open a new window.


Select Add Color from the options in the Palette Editor window.
Create a new CMYK Color with values C=26 M=0 Y=69 K=0. This creates a lovely lime green color. Give the color a name, e.g. ‘Lime Green’, and click OK to add it to the palette.
Select Add Color again, and repeat the process for a further six colors, with the following CMYK values and names:
- C=0 M=89 Y=41 K=0 (Coral)
- C=76 M=11 Y=34 K=0 (Turquoise)
- C=0 M=69 Y=69 K=0 (Orange)
- C=3 M=83 Y=0 K=0 (Hot Pink)
- C=69 M=0 Y=0 K=0 (Blue)
- C=88 M=87 Y=0 K=0 (Purple
- )


Step 2
Select the Rectangle tool (F6) from the Toolbox.

Drag to create a shape that extends across the first marked out section of theFront page (from the bleed up to the 49.5 mm guide), and extends up to the bleed on the top, left and bottom edges of the page.
Set the Fill to Coral and the Stroke to No Color.

Select the rectangle shape and Edit > Copy, Edit > Paste, positioning this second shape on the far right section of the page (between the 247.5 mm guide and the far-right bleed edge). Adjust the Fill to Turquoise.

6. Introduce Simple Geometric Shapes
Step 1
Return to the Object Manager and Lock the Color layer; Unlock the next layer up, Colored Shapes.
Select Basic Shapes from the Toolbox, and you’ll notice that the Property Bar running along the top of the workspace now offers you some different options related to the Basic Shapes tool. Select a Triangle shape from the drop-down menu of options in the center of the Property Bar.

Click and drag onto the page, pulling out a triangle shape with a point that extends from the centre of the left side of the document, with the flat edge of the triangle resting against the 198 mm guide, as shown below.

Under Object Properties, which you’ll find to the right of the workspace, next to the Object Manager tab, set the Outline of the triangle to None.

Set the Fill of the triangle to Lime Green.

Step 2
Edit > Copy, and Edit > Paste the green triangle, and then drag the far-left point of the pasted shape back in on itself to flip the shape horizontally.
Adjust the Fill to Orange. Position this second triangle below the first green triangle, nesting them together, as shown, to create a rough rhombus shape. The triangles don’t have to match perfectly in size—a little imperfection can look good.
To adjust the size and shape of the triangles more easily, Right-Click > Convert to Curves.

You can also hit F10 on the keyboard to manipulate the nodes of a shape.

Edit > Copy, Edit > Paste the orange triangle to create a third triangle. Adjust the Fill to Hot Pink.

Pull the triangle back to make it more squat, and then position it so that the point of the triangle rests against the top of the green shape, and meets the edge of the photo of the beach.

Edit > Copy, Edit > Paste the green triangle, and stretch it out a little so it’s narrower. Position it so it fits nicely below the orange triangle, and extends across the right edge of the page. Change the Fill to Blue.

Step 3
Take the Two-Point Line tool from the Toolbox.
Left-click with your mouse onto the page, hold the mouse-button down, drag downwards and release to create a short vertical line.

Position across the left side of the page, crossing the far left edge of the green triangle, just where the shape crosses the 49.5 mm guide.

Select both the green triangle with your cursor and the line, and Edit > Copy, Edit > Paste.
Position the pasted shapes, so that the line sits perfectly along the far guide, at 247.5 mm, with the triangle sitting centrally (horizontally) on the page.

Delete the two-point line on both the left and right sides of the page; we were just using these for guidance. Now, when you fold the brochure, the triangle shape will appear seamless.
Adjust the Fill of the pasted triangle to Blue.


Step 4
Create another triangle shape, position as shown so that it fills the gap at the top right of the page, and change the Fill to Hot Pink. You can adjust the Angle of Rotation from the Property Bar if needed, to give your triangle shape the approximate position as shown below.
.


Introduce Clean, Minimal Typography
To make the text of your brochure appear modern, eye-catching and easy-to-read, you should try to choose a typeface in a clean sans serif. FiraSans is a lovely choice, and it has lots of different weights to provide a bit of flexibility.
Download the font and return to CorelDRAW.
Step 1
Back in the Object Manager, Lock the Colored Shapes layer, by clicking on the pencil icon to the left of the layer's title. Unlock the next layer up,Typography, by also clicking on the pencil icon next to the layer's name to remove the red circle sitting in front of the pencil.

Select the Text tool (F8) from the Toolbox, and drag to create a new text frame in the centre of the page. Type ‘VISIT THE’ and set the Font to Fira Sans Normal, and increase the Font Size to 110 pt, from the options available in theProperty Bar running along the top of the workspace.

Set the Font Color to White, from the set of colors in the Color Palette you can find at the bottom-left of the workspace.


Edit > Copy, and Edit > Paste the text frame, sitting it just below the first. Type‘BEACH’, and up the Font Size to 160 pt.
Edit > Paste another text frame, sitting it below ‘BEACH’ and type ‘THIS SUMMER’, reducing the Font Size to 65 pt.

Step 2
Create another text frame using the Text tool (F8), type ‘EXPLORE NATURE’, and set the Font Size to 65 pt and Font Color to White.
Highlight just ‘EXPLORE’ alone and set the Font to Fira Sans Medium; Highlight‘NATURE’ and set the Font to Fira Sans Normal.

Select the text frame, then type in 90 degrees into the top Property Bar just next to the Rotate icon, to rotate the text frame upwards.

Position the text frame in the bottom left-hand corner of the page, making sure there is a nice margin between the edge of the page and the text (don’t let the text spill onto the bleed).
Then, select the text frame and Edit > Copy, Edit > Paste. From the Property Bar, type in -180 degrees to flip the pasted text frame. Position in the top right corner of the page, and edit the text to read ‘DISCOVER ADVENTURE’.
Step 3
Populate the Front page of the brochure with as much, or as little, text as you like.
Here, I’ve put a smaller sub-heading below the ‘VISIT THE BEACH THIS SUMMER’ title, which is set in Fira Sans, Size 22 pt, and Aligned Right (adjust alignment from the Toolbar).
I’ve also introduced a small caption below the photo of the beach on the right-hand side of the page, set in Fira Sans Italic, Size 22 pt, Aligned Right.
I’ve also placed a small section of text in the orange triangle (to the right of the 49.5 mm guide), set in Fira Sans Normal, Size 22 pt, and pulled out the first few words of the text in Lime Green.
Step 4
To add a touch more typographic drama to your brochure, create a new text frame using the Text tool (F8), type just the capital letter ‘E’ (for ‘Explore’), and set the Font to Fira Sans Normal, Size 400 pt.
Position in the top left corner of the page, and adjust the Font Color to Lime Green.
Select the text frame and Edit > Copy, Edit > Paste, positioning this pasted text frame in the bottom-right corner of the page. Adjust the letter to read ‘D’ (for ‘Discover’) and alter the Font Color to Blue.
Finalize the Reverse of Your Brochure
Step 1
In the Object Manager, Unlock all the layers by clicking on the pencil icon to the left of each layer's name.

Then, still on the Front page of the document, go up to Edit on the menu bar and choose Select All > Objects. CorelDRAW will pick up all the objects on the page, including the photos, colored shapes and text frames.
Click on the tab at the bottom of the workspace to access the Reverse page of the document.
Go to Edit > Paste. The objects will be pasted onto one layer in a sequence of groups. Go through the groups and move them onto their appropriate layers,Images, Color, Colored Shapes or Typography on the Reverse page.
You now have a complete copy of everything you had on the Front page on the Reverse page too.
Step 2
Lock the Typography, Colored Shapes and Color layers, leaving the Images layer unlocked.
To give the reverse of the brochure a slightly different look, we can replace the colored photos with black-and-white versions. You can do this by using Corel PHOTO-PAINT to edit the image.
You can launch Corel PHOTO-PAINT from within CorelDRAW, which is really useful for performing edits to your images really quickly.
First, select the top image of the beach (the one sitting at the top center of theReverse of the brochure) with your cursor.
Then navigate to Bitmap on the menu bar. Select Edit Bitmap... from the drop-down menu.
A Corel PHOTO-PAINT window opens within the program, and you can make edits directly to the image from here.
We can switch the image to a black-and-white version by applying a Grayscale effect to desaturate the image of color. To do this, remaining within the Corel PHOTO-PAINT window, go to Adjust > Grayscale.
In the Grayscale window that opens, keep the sliders to their default settings, then click OK.
Click the Finish Editing button at the far-right of the Toolbar to return toCorelDRAW instantly.
The image has now been updated to the new black-and-white version.
Step 3
Edit > Copy and Edit > Paste the black-and-white beach image and place it over the top of the photo on the right side of the page, trying your best to match up the position. Use the Crop Tool to shave off the edges of the image that are sticking out.
Step 4
Navigate over to the Object Manager, and Lock the Images layer. Unlock the next layer up, Color. Ungroup the Objects in the layer so you can edit them individually.

Adjust the Fill Color of the left-hand rectangle to Turquoise, and change the Fill of the right-hand triangle to Hot Pink.
Step 5
Lock the Color layer and Unlock the Colored Shapes layer above it. Ungroup the Objects sitting in the Colored Shapes layer.
Play around with the Fill of the triangle shapes on the Reverse page of the brochure. Adjust the color of all the shapes, using the colors you created for your custom color palette earlier, so that they contrast nicely against the color arrangement on the Front page.

Step 6
Lock the Colored Shapes layer and Unlock the Typography layer on the Reverse page of the document.
Adjust the text in the center of the page to read ‘HOW DO I GET HERE?’, adjusting the sizing of the text appropriately, to fit between the two central guides on the page.
Introduce some more sections of text in different corners of the page, setting the Font to Fira Sans Normal, Size 22 pt and Aligned Left, from the Property Bar at the top of the work space.
Pull out the first few words of each section of text in a bold, contrasting color of your choice from the color palette we created earlier.
Congratulations!
Your Brochure is Really .

